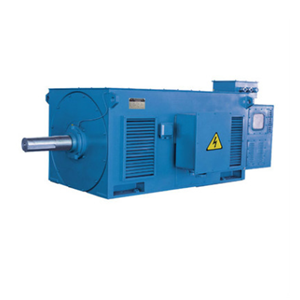
6 Questions on Mechanical Fault Maintenance of Hengli Motor Motor
The following content is for reference only. If the motor encounters a malfunction, please go to a professional repair station or return to the factory for repair!!!!!!
1. What checks should be done on the motor before repairing mechanical faults?
To identify the cause and approximate scope of the fault, Hengli Motor should conduct the following external inspections before repairing the mechanical faults of the motor.
① Check for cracks in the machine base and end cover, and for cracks or bending deformation in the shaft.
② Check whether the rotor rotates flexibly and smoothly, whether the axis moves, and whether there are any abnormal sounds.
③ Check if the bearings are loose or stuck.
④ Check whether the air duct is blocked, and whether the fan blades and heat sinks are intact.
⑤ For motors with larger capacity, there are usually air gap holes on the end caps, which can be used to detect whether the average unevenness of the air gap is within 15%.
⑥ Turn on the power and use methods such as touching, listening, smelling, and observing to check if the motor is functioning properly. Once an abnormality is detected, the power should be immediately cut off to prevent the fault from escalating.
After confirming the nature of the fault and clarifying the scope of maintenance through inspection, the motor can be disassembled for further detailed inspection and repair.
For the mechanical parts inside the motor, the constant force motor should undergo the following inspections:
① Check for any scratches on the surface of the stator and rotor iron cores. When there is only one scratch on the surface of the rotor, while the surface of the stator is completely scratched, it is caused by the bending of the shaft or the imbalance of the rotor; When there is only one scratch on the surface of the stator, but there are scratches all around the rotor surface, it is caused by the lack of concentricity between the stator and rotor, such as deformation of the machine base and end cap stopper or severe bearing wear causing the rotor to sink, etc; If there are large areas of scratches on both the stator and rotor surfaces, it is caused by a combination of the above two reasons.
② Check if the stator and rotor iron cores are aligned. If not aligned, it is equivalent to shortening the iron core, which increases the magnetic flux density and causes the iron core to overheat. The reason is that the axial displacement of the rotor iron core or the replacement of a new rotor is not suitable. In addition, it is necessary to check whether the stator and rotor iron cores have moved along the circumferential direction. If there is any movement, it indicates that the screws fastening the stator are loose or damaged, or that the rotor core is not tightly matched with the shaft.
③ Check for cracks or fractures in the rotor end ring, damage or deformation of the fan blades, and bending of the shaft.
④ Check whether the fit between the inner and outer sleeves of the bearing, the journal, and the bearing chamber meets the requirements, and whether there is any tightness or looseness; Check the degree of bearing wear, whether the bearings are intact, and whether the lubricating oil (grease) is too little or dry.
2. How to disassemble and assemble the motor?
It is often necessary to disassemble the motor during maintenance, as improper disassembly can damage the motor. Therefore, motor maintenance personnel must master the correct techniques for disassembling and assembling motors.
When disassembling the motor, the following steps should be followed.
① Remove all external wiring and mark all wire ends, especially those with polarity (DC motor).
② Disassemble the pulley or coupling, and record the distance between the coupling and the shaft platform.
③ Remove the screws from the commutator side end cover and bearing cover, and open the end cover.
④ Open the ventilation window on the side cover of the commutator, take out the electric brush from the brush holder, remove the wire connected to the brush rod, and make a mark.
⑤ Before disassembling the side end cover of the commutator, mark the joint between the end cover and the machine base, and then place a wooden board on it. Use a hammer to evenly tap the edge of the end cover, so that the end cover stopper slowly separates from the machine base and bearing outer sleeve. Mark the position of the brush holder again and remove it.
⑥ Wrap the commutator with thick paper or cloth to keep it clean and avoid damage.
⑦ Remove the end cap screws on the shaft extension side, and extract the armature and end cap from the stator core. During operation, be careful not to damage the armature winding.
⑧ To replace the bearing, the bearing screws on the shaft extension side can be removed, and the bearing outer cover, end cover, and bearing can be removed.
When assembling the motor, the operation steps are opposite to those during disassembly. Simply reset each component and wiring according to the markings.
3. How to disassemble the brush holder, fan cover, and fan blades?
The disassembly methods for the motor brush holder, fan cover, and fan blades are as follows.
① For enclosed motors, after disassembling the pulley or coupling, unscrew the screws of the outer fan cover and remove the fan cover. Afterwards, unscrew the positioning screw or remove the pin on the fan at the end of the rotor shaft, and gently and evenly tap around the fan with a wooden hammer to loosen and remove the fan.
② For wound motors, first release the brush holder spring, lift the brush holder to remove the brush, and then remove the brush holder. To ensure accurate resetting during assembly, markings should be made before disassembly.
③ For small motors, the fan does not need to be removed, but can be extracted together with the rotor. When the bearings inside the end cap need to be lubricated or replaced, the fan should be removed.
④ The disassembly method of the fan blade should vary depending on the installation method. Some wind blades are fixed with clamping screws, some with support head screws, and some with pins. There are two square holes on the new plastic fan blades, which are used for inserting two hooks into the holes of the shaft puller for disassembly. There are two threaded holes drilled near the axis on the fan blades of large motors, which are used to alternately screw in two screws that match the holes and push the fan blades out. The fan blades of large motors are tightly installed and difficult to remove. Therefore, when disassembling the fan blades, the fixing method of the fan blades should be carefully observed, and corresponding disassembly measures should be taken afterwards.
4. How to disassemble the end cap?
The method for disassembling the end cover of the motor is as follows.
① To avoid mistakes during assembly, mark the joint between the casing and the end cover before disassembling the end cover.
② Before disassembling the sliding bearing end cover, the lubricating grease (oil) should be drained first, and the oil ring should be lifted and tied up.
③ For slip ring or commutator motors, the electric brush should be removed, lifted, and securely tied, and the position of the brush holder should be marked. Be careful not to damage the electric brush and lifting device during disassembly.
④ For motors with roller bearings installed on the load end, the non load end should be disassembled first.
⑤ Generally, small motors only need to remove the end cover on the fan side. First, remove the screws on the end cover, and then extract the rotor, end cover, bearing cover, and fan together.
⑥ For large and medium-sized motors, due to the heavy rotor, it is necessary to remove the end caps on both sides. When disassembling the double-sided end cover, first loosen the screws on the upper cover, then unscrew the screws on the lower cover, then lift off the upper cover, pry open and remove the upper tile, take out the oil ring, remove the lower tile, and remove the lower cover. For ease of assembly, the load end and non load end should be marked during disassembly.
⑦ When disassembling the end cover of the rolling bearing, the small cover should be removed first, then the screws of the large cover should be removed, and the large cover should be removed.
⑧ To prevent damage from collision between the stator and rotor, insulation cardboard should be placed in the air gap after removing the end cover.
⑨ The disassembled small parts should be stored in a dedicated parts box, and each set of parts should be assembled together in its original state for easy assembly.
5. How to check and clean the stator and rotor?
After the motor is disassembled, the following inspections and cleaning should be carried out on the stator and rotor.
① Clean the dust on the stator and rotor with compressed air or a leather tiger.
② Clean the oil tower and dirt on the coil with a clean cloth dipped in alcohol or carbon tetrachloride solution.
③ Clean the iron core, coil, and commutator without using metal tools to prevent damage to the insulation. Use a clean brush or soft cloth instead.
④ Check whether the iron core laminations are tight, and whether there are defects such as burrs and bends; Whether the clamping bolts are symmetrically tightened, and whether the chains, pins, etc. are loose; Is there any debris blocking the ventilation duct and is the ventilation plate welded firmly.
⑤ Check the insulation of the coil for bubbles, peeling, and damage; Whether the binding wires, slot wedges, and pads of the coil are complete and fastened, and whether there are any looseness, movement, or protrusion of the iron core from the slot wedges.
⑥ Check if the magnetic pole and coil are securely fixed, if the insulation of the insulation bolt is good, if the compensation coil on the pole palm is wedged tightly, and if there are any bends or short circuits in the wiring.
⑦ Check whether the balance block on the rotor is firm, and whether there is any displacement, detachment, or other phenomena.
⑧ Check whether the armature winding is firmly tied, and whether the head cover, lifting plate, and lead wire are damaged or poorly welded, and whether there are conductive foreign objects between the seams.
⑨ Check whether the copper bar (aluminum bar) of the cage rotor is broken, whether the welding with the end ring is firm, whether there are cracks or looseness, and whether the leads are damaged or broken.
In the above inspection, if any problems are found, corresponding measures should be taken to repair them, and damaged ones should be replaced in a timely manner.
6. How to repair the motor base?
The motor frame (also known as the casing) is used to support the stator core and fix the motor, and the two end faces are also used to fix the end caps and bearings.
Due to improper manufacturing, handling, use, and disassembly, the machine base is often damaged, affecting the normal operation of the motor. The common faults of the machine base are deformation, rupture, damage to the heat sink, and damage to the stopper. Once the above faults occur, the motor will vibrate, sweep the chamber, raise the temperature, and produce serious noise due to unstable operation, which will make it difficult to disassemble and assemble the motor.
The base of the motor frame is made of cast iron. If it is installed unevenly, vibration may occur during motor operation, or mechanical force may cause cracking or breakage of the base foot of the machine. When the bottom foot of the machine seat cracks or breaks, it can be repaired by welding with cast iron welding rods. To remove the internal stress of cast iron before welding, the welding area should be heated to around 600 ℃ with a spray gun, and then allowed to cool naturally after welding.
If the broken part is very close to the motor core, or if all the feet on both sides are broken, using electric welding will damage the stator winding, and angle iron should be used for repair. Select the corresponding angle iron according to the size of the foot, process it into the shape of the foot, and then fasten it to the motor casing with bolts.
When there are cracks in the casing, the iron core inside will loosen, and it can be repaired by welding. But before welding, the cracks should be tightened to prevent deformation of the casing after welding. During welding, attention should be paid to ensuring that the position of the iron core is not offset and that the iron core does not loosen inside the casing. To eliminate the internal stress of the casing, after welding, the casing should be placed in a straw ash or drying room for slow cooling.
For cracks in the casing, tin lead alloy can be used for welding repair. Tin lead alloy is made by heating and softening 73% tin and 27% lead in a crucible or iron vessel, uniformly mixing them, and casting them into slender welding rods. Use a chisel to chisel out the groove at the crack in the casing, remove iron filings and oil stains, and then use a spray gun to heat the crack to around 100 ℃, which can be repaired with tin lead alloy welding rod. When repairing welding, first use hydrogen peroxide or other strong oxidizing agents to remove the rust on the groove, and then use a small amount of tin lead alloy as a base. After the tin lead alloy is combined with the cast iron material of the groove, apply welding until it is welded flat.
The above content is sourced from the internet. If it involves infringement, please contact us for deletion.